

Expert articles, application notes, and industry guides from AWI Power Co., Ltd.
In-depth insights into AC-DC switching power supplies, pure sine wave inverters, and thermal management.
Choosing a Rain Proof Power Supply for outdoor use requires more than checking whether its case looks sealed. Rain, condensation, dust, heat, and sudden voltage changes can all affect performance. A reliable unit must match the equipment’s voltage, current, wattage, and operating environment.
Look for a clearly stated IP rating, such as IP65 or IP67. These ratings describe protection against dust and water exposure, but they do not make every installation fully waterproof. A power supply under a roof may face less direct rain, while one beside a garden path may receive splashing water and muddy runoff. The difference matters. Check the manufacturer’s technical documents, safety certifications, temperature range, and recommended mounting position. Reputable suppliers should explain these details without vague promises.
Practical testing also helps. Inspect cable glands, connectors, and drain paths before connecting the load. Keep the unit away from standing water. Leave space around ventilation areas, even when the enclosure appears sealed. An oversized power supply may waste energy, while an undersized one can overheat during startup. That mistake is easy to make. Surge protection, grounding, and suitable outdoor cables deserve equal attention.
A Rain Proof Power Supply is only as dependable as its complete installation. Weather changes, cable aging, and poor mounting can weaken protection over time. I would not rely on appearance alone. Compare independent test information, confirm the warranty terms, and review the load calculation twice. Small details often decide whether outdoor lighting, cameras, pumps, or control systems keep working after a heavy storm.
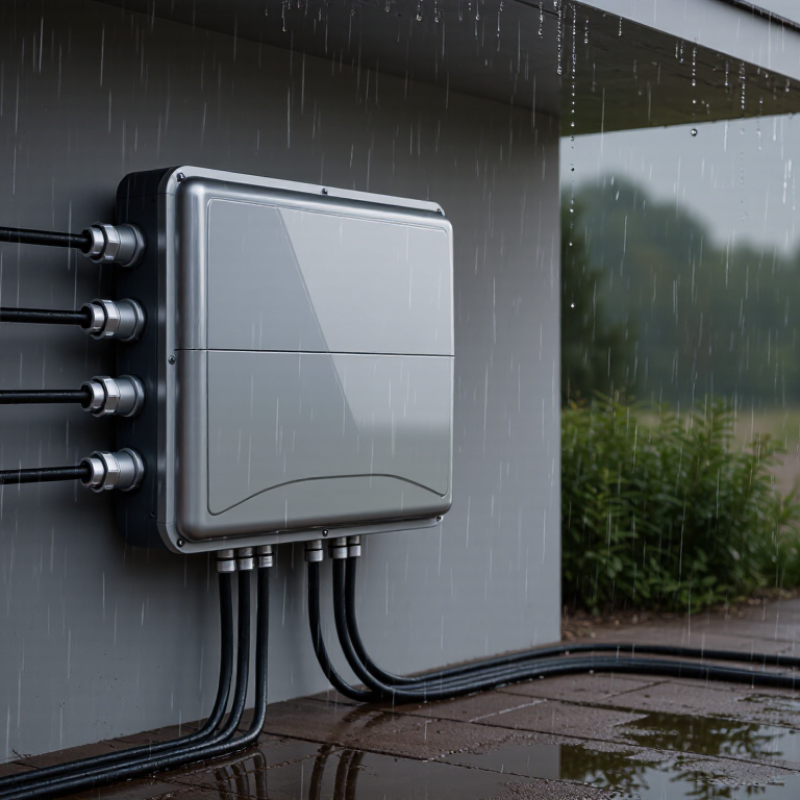
Understanding the rainproof rating is more important than trusting the word “outdoor.” Most ratings use the IP code, defined by international standards. The first digit measures protection against solid objects, while the second measures water resistance. For example, IP65 usually means dust-tight protection and resistance to water jets. It does not mean the unit can stay underwater.
Check the real exposure around the installation point. A covered patio may only need protection from dripping water, while an open garden wall faces wind-driven rain. IP44 can resist splashing from several directions, but IP67 offers stronger protection against temporary immersion. Neither rating removes the need for careful mounting. Keep connectors facing downward. Use sealed cable glands. Avoid placing the supply where puddles can form.
Look for certification details, test conditions, and temperature limits in the technical documentation. A vague claim such as “waterproof” is not enough. During inspections, moisture often enters through cable openings rather than the housing itself. Condensation can also build up after cold nights. That detail is easy to miss. I would rather choose a slightly higher rating than depend on a roof that cannot block wind-driven rain. Still, a higher IP number cannot correct damaged seals, loose covers, or poor wiring. Local electrical rules may also require additional protection, grounding, or a residual-current device. Check them before installation.
Choosing a rainproof power supply starts with identifying the correct voltage, wattage, and total load. Write down every connected device.
Check each label, manual, or measured operating value. Voltage must match the equipment exactly. Never assume.
An outdoor LED strip may require 12 volts, while a pump may need 24 volts. Long cable runs can create voltage loss, especially with thin conductors. Measure voltage at the far end when possible. That small drop can cause flickering, weak motors, or repeated restarts. I once sized a supply from the lamp rating alone. The lights worked, but the distant section dimmed after several meters. The cable choice was the real problem.
Add the running wattage of all devices that may operate together. Then include startup demand from motors, pumps, fans, or heating elements. Their initial surge can greatly exceed normal consumption. Choose a supply with practical reserve, often 20–30 percent above the calculated load. Avoid using the maximum rating continuously. Heat, sunlight, and sealed enclosures can reduce reliable output.
Load requirements also include operating time and switching behavior. A controller may add only a few watts, but it still needs stable voltage. Check whether the supply supports the required current at the selected voltage. For outdoor installation, verify its ingress rating and mounting instructions. Rain resistance is not the same as submersion protection. Keep connectors elevated, use proper cable glands, and leave a drip loop below the enclosure. I still recheck calculations after installation, because real cable length and weather often differ from the original plan.
Compare the estimated operating wattage of common outdoor loads with a recommended power-supply rating that includes approximately 25% spare capacity. Confirm that the supply voltage matches the equipment voltage before installation.
The sizing principle is watts = volts × amps. For example, a 24 V, 3 A pump requires 72 W, so a supply rated at about 90 W provides practical headroom for startup and continuous operation. Use an enclosure and cable system suitable for outdoor exposure, and select an appropriate ingress-protection rating for the installation environment.
How to Choose a Rain Proof Power Supply for Outdoor Use
Outdoor power supplies face more than rain. They also endure sunlight, dust, temperature changes, and condensation. Choose UV-resistant polycarbonate for lightweight installations, or coated aluminum for stronger impact protection. Stainless steel screws help reduce corrosion around the enclosure. The material must remain stable after years outside, not only during a showroom test.
Check the enclosure’s IP rating carefully. A sealed gasket should sit evenly without twisting or gaps. Use cable glands that match the cable diameter, and add a drip loop below each entry point. This prevents water from following the cable into the housing. Connectors should resist moisture and repeated temperature changes. Gold-plated contacts may help, but correct sealing matters more. Avoid placing the enclosure with its cable openings facing upward. That mistake is easy to make.
Tips: Leave room for airflow and heat release. A power supply can become hot under continuous load. Use a breathable membrane when pressure changes may cause condensation. Inspect seals after installation, especially if the housing is opened later. I once trusted a high IP rating and ignored poor mounting direction; water still collected near the connector. That experience changed my approach. Ratings describe test conditions, not every real installation. Choose a design that supports inspection, drainage control, and safe cable routing. Test the setup after heavy rain, then check for moisture, loose terminals, or unusual heat.
| Selection Dimension | Recommended Specification | Suitable Materials or Design | Why It Matters Outdoors | Verification or Practical Check |
|---|---|---|---|---|
| Ingress Protection | Minimum IP65 for exposed installations; IP66 or IP67 for more demanding locations. | Use a sealed enclosure, continuous gasket, covered ventilation solution, and properly tightened cable entries. | IP65 protects against dust and water jets. IP66 adds protection against powerful water jets, while IP67 covers temporary immersion under defined test conditions. | Confirm that the complete assembly, including cable glands and connectors, has the required IP rating. The rating of the power supply alone is not sufficient. |
| Enclosure Material | Choose a material compatible with moisture, ultraviolet exposure, temperature, and the local atmosphere. | UV-stabilized polycarbonate or glass-reinforced plastic for lightweight installations; powder-coated aluminum or stainless steel for higher mechanical and corrosion resistance. | Material selection affects impact strength, corrosion resistance, heat dissipation, weight, and service life. | Check UV-resistance data, impact rating, operating temperature range, coating quality, and compatibility with cleaning agents or salt spray. |
| Corrosion Resistance | Use corrosion-resistant hardware and surface treatments appropriate for the site. | Prefer stainless-steel fasteners, nickel-plated or corrosion-resistant terminals, sealed cable glands, and compatible protective coatings. | Standing water, condensation, road salt, fertilizers, and coastal air can cause corrosion at joints, terminals, and fasteners. | Inspect dissimilar-metal interfaces for galvanic-corrosion risk. Avoid trapping water around screws, seams, and cable-entry points. |
| Input Voltage | Match the supply to the available electrical system and allow for expected voltage variation. | Select the correct nominal input class, such as low-voltage DC or single-phase AC, and use a suitable protective device upstream. | Incorrect input voltage can cause overheating, unstable operation, insulation stress, or immediate equipment failure. | Verify nominal voltage, frequency where applicable, maximum input current, inrush current, and allowable input tolerance on the electrical specification. |
| Output Voltage and Power | Use the required output voltage and provide a practical power margin of approximately 20% to 30% above the continuous load. | Choose a regulated output with overload, short-circuit, and over-temperature protection. | A moderate reserve helps accommodate startup demand, cable losses, load growth, and elevated ambient temperatures. | Calculate continuous load, startup load, cable voltage drop, and maximum ambient derating before final selection. |
| Connector Type | Use sealed connectors or cable glands rated for the outdoor environment and the cable diameter. | Threaded waterproof cable glands, locking circular connectors, or sealed terminal compartments with strain relief. | Connectors are common water-entry points. A connector must maintain its seal after vibration, cable movement, and repeated maintenance. | Check the connector IP rating when mated, temperature range, current rating, locking method, and compatibility with the cable jacket. |
| Cable Selection | Use outdoor-rated cable with a conductor size selected for current, distance, installation method, and voltage drop. | UV-resistant, flexible cable with an appropriate insulation system; use jacket materials designed for wet locations and the expected temperature range. | Indoor cable jackets may become brittle, swell, or degrade under sunlight, moisture, oils, or temperature cycling. | Confirm conductor cross-sectional area, insulation voltage rating, UV and wet-location suitability, bend radius, and installation regulations. |
| Grounding and Bonding | Provide protective earthing or bonding wherever required by the power system and enclosure construction. | Use a dedicated grounding point, secure bonding hardware, and corrosion-resistant connection surfaces. | Grounding helps reduce electric-shock risk and provides a fault-current path for protective devices. | Verify continuity of protective conductors, enclosure bonding, terminal tightness, and compliance with local electrical codes. |
| Thermal Management | Keep the power supply within its specified ambient-temperature range and apply output derating when required. | Use a shaded mounting position, thermally conductive enclosure surfaces, adequate clearance, or a sealed heat-transfer design. | Direct sunlight can raise enclosure temperature significantly, while a sealed enclosure can restrict natural cooling. | Review the manufacturer’s derating curve, measure the internal temperature during peak conditions, and avoid placing the unit above heat sources. |
| Condensation Control | Prevent water accumulation while preserving the required ingress protection. | Use a correctly oriented enclosure, drip loops, sealed entries, pressure-equalization vent where suitable, and drainage only where the design permits it. | Temperature cycling can create internal condensation even when rain cannot enter directly. | Inspect for low points, unsealed cable paths, trapped moisture, and thermal bridges. Do not add unapproved holes to a sealed enclosure. |
| Mounting Orientation | Follow the enclosure’s permitted mounting position and keep cable entries facing downward or protected from direct runoff. | Use a raised bracket, rain shield, drip edge, and spacing from walls where recommended by the design. | Correct orientation prevents water from pooling on seals and entering through cable glands or seams. | Confirm drainage paths, clearance around heat-dissipating surfaces, mechanical support, and access for inspection. |
| Electrical Protection | Provide protection appropriate to the circuit, including overcurrent and surge protection where exposure requires it. | Use correctly rated fuses or circuit breakers, residual-current protection where applicable, and surge protective devices for exposed wiring. | Outdoor circuits can experience lightning-related surges, switching transients, overloads, and insulation faults. | Coordinate protective-device ratings with the supply’s inrush current and short-circuit capability, and follow local regulations. |
| Mechanical Protection | Select an enclosure with sufficient impact resistance for the installation location. | Use reinforced polymer or metal construction, protected cable routes, tamper-resistant fasteners, and strain relief. | Impact, vibration, falling objects, and cable pulling can compromise seals or damage internal components. | Check the enclosure impact rating, mounting strength, fastener security, cable support, and resistance to vibration. |
| Standards and Testing | Use products tested to applicable safety, enclosure, EMC, and environmental requirements. | Look for documented tests covering ingress protection, electrical safety, dielectric strength, insulation resistance, EMC, and temperature operation. | Documented testing provides evidence that the design has been evaluated under defined conditions rather than only observed during normal operation. | Request test reports or declarations relevant to the installation. Confirm that tests apply to the complete installed configuration. |
| Inspection and Maintenance | Establish a periodic inspection schedule based on exposure, criticality, and local conditions. | Use accessible covers, replaceable gaskets where practical, labeled terminals, and visible indicators for status and faults. | Seals age, cable glands loosen, and corrosion can develop gradually without immediately causing a failure. | Inspect gasket compression, connector locking, cable damage, corrosion, water marks, mounting security, and protective-device condition. |
Technical note: IP ratings are defined for specific test conditions under IEC 60529. Select the complete installed system—including enclosure, cable glands, connectors, mounting orientation, and wiring—for the required outdoor protection level.
Choosing a rain-proof power supply begins with the installation site, not the product label. A covered patio has different risks from an exposed wall beside a lawn sprinkler. Check direct rainfall, wind-driven water, standing moisture, dust, sunlight, and temperature changes. Measure the enclosure location carefully. Leave space for airflow and cable bends.
In field inspections, I look for drainage first. Water can collect beneath an enclosure, even when the front remains dry. Use sealed cable glands, downward-facing cable entries, and corrosion-resistant mounting hardware. An IP65 enclosure blocks dust and water jets, while IP67 also tolerates temporary immersion. However, an IP rating does not guarantee protection from condensation, ultraviolet exposure, or poor installation.
The power supply should match the local voltage, load, and temperature range. Select protective features such as overload, short-circuit, and over-temperature protection. Grounding must follow applicable electrical codes. Keep connectors away from puddles and avoid trapping cables against sharp metal edges.
Small details matter.
I once trusted a high protection rating and ignored morning condensation. Moisture later appeared inside the enclosure. That mistake changed my inspection routine. I now check ventilation, drainage, and temperature cycling before judging outdoor suitability. A sheltered position may reduce water exposure, but it can also hold humid air. The safest choice depends on the complete installation environment, not one impressive specification.
How to Choose a Rain Proof Power Supply for Outdoor Use
A rain-proof power supply should meet recognized electrical safety standards for your region. Check its certification marks, rated voltage, grounding method, and protection against overcurrent. An IP rating also matters, but it does not make every product safe in deep water. Confirm what the rating actually covers. Some labels sound reassuring, yet they may only describe dust resistance or light splashes.
During outdoor inspections, I look for sealed cable entries, intact gaskets, and covers that close firmly. Small cracks can admit water after repeated temperature changes. Keep the unit above standing water and provide a drip loop in the cable. Never hide it under wet leaves or a loose plastic sheet. That can trap condensation.
Maintenance should be simple and documented. Check the housing, connectors, and mounting points before storms and after severe weather. Clean dirt with a dry or slightly damp cloth, following the manufacturer’s instructions. Do not open the enclosure unless a qualified technician is permitted to do so. Reliability is more than a long service claim. Review test conditions, load limits, warranty terms, and replacement support. A power supply that runs quietly for one week proves little. I once treated a clean exterior as evidence of good condition, but corrosion had already started inside a connector. That mistake changed my inspection routine. Record failures honestly. They reveal weaknesses better than attractive specifications.
UV-resistant polycarbonate is lightweight and suitable for sheltered installations. Coated aluminum offers stronger impact protection. Stainless steel screws can reduce corrosion. Choose materials that remain stable outdoors for years, not only during testing.
IP65 protects against dust and water jets. IP67 also allows temporary immersion. However, ratings reflect controlled tests. They do not cover condensation, sunlight, drainage, or poor mounting.
Use sealed cable glands matching the cable diameter. Point cable entries downward. Add a drip loop below each entry. This helps stop water from following the cable indoors. Never leave openings facing upward.
Leave space for airflow and heat release. A breathable membrane may help during pressure changes. Avoid sealing trapped humid air without considering ventilation. Check inside the enclosure after temperature changes.
Check rainfall, wind-driven water, dust, sunlight, standing moisture, and temperature swings. A lawn sprinkler can create unexpected exposure. Morning condensation may matter more than visible rain. Small details matter.
Select overload, short-circuit, and over-temperature protection. Confirm the local voltage and expected electrical load. Check the operating temperature range. Grounding must follow applicable electrical codes.
Choose connectors that tolerate moisture and repeated temperature changes. Contact plating may help, but proper sealing matters more. Keep connectors away from puddles. Prevent cables from rubbing against sharp metal edges.
Test the setup after heavy rain. Look for moisture, loose terminals, and unusual heat. Inspect gaskets after opening the housing. I once trusted a high rating and ignored mounting direction. Water still gathered near the connector.
Choosing a Rain Proof Power Supply for outdoor use begins with understanding its protection rating and the conditions it must withstand. A suitable unit should offer reliable resistance to rain, moisture, dust, and accidental water exposure. Before purchasing, calculate the required voltage, total wattage, and expected load, allowing enough capacity for startup surges and future equipment needs. Selecting durable materials, sealed connectors, and a well-designed enclosure can further improve performance and reduce the risk of corrosion or water entry.
Installation conditions are equally important. Consider whether the power supply will be exposed to direct rainfall, high humidity, temperature changes, sunlight, or limited ventilation. Look for features such as secure cable entry points, effective heat dissipation, grounding provisions, and overload or short-circuit protection. Finally, review applicable safety standards, manufacturer testing information, maintenance requirements, and overall product reliability. Regular inspection, cleaning, and checking of seals and connections will help maintain safe, stable operation throughout the product’s service life.